How to get greater resolution from your color sensor using a low cost 18 MP IDS camera

Bayer Patter - Mono
IDS UI-3590 camera
IDS UI-3590CP camera

The AR1820HS Image sensor 18 mega pixel sensor in the IDS Imaging IDS Imaging UI-3590 camera models was launched by the sensor manufacturer ON Semiconductor as a pure color sensor.  Like all color sensors, the Bayer filter means that you get color images with effectively only around a quarter of the nominal sensor resolution, as the color information for each pixel is obtained from four neighbors

To use each individual pixel, however, it is not sufficient to operate the sensor in RAW data format (without Bayer interpolation).  Operating in a raw format results in a different brightness perception of the individual pixels and NOT a usable image.

This technical tip will show you how to use the color sensor as a “pure” mono sensor by appropriate parameter settings and the use of suitable light sources, in order to obtain a significantly higher resolution.

Applications which require a color image and precision will benefit from this camera and method.. and all for less than $600 with the IDS UI-3590LE camera

Background

Bayer Pattern
Arrangement of colour filters in the Bayer matrix

The principle of digital image sensors such as the 18 MP ON Semiconductor AR1820HS means that they acquire only brightness, but not color information.

As a result, a color filter is applied to each pixel during manufacture of the color sensors.  This is known as the Bayer matrix.

Of each four pixels, two pixels are given a green color filter, one pixel a red filter and one pixel a blue color filter.  This color distribution corresponds to the perception of the human eye and is referred to as the Bayer matrix.

RGB Filter
The RGB filter layers only transmit light with
a particular wavelength

A pixel depicts only the information for one color.

To obtain the complete RGB values for each pixel, the missing primary colors are interpolated from four neighboring pixels using appropriate algorithms. This color interpolation assumes that there are only slight color differences between two adjacent pixels of the same color.  Strictly speaking, a sensor with Bayer matrix therefore has only a quarter of the native sensor resolution

Sensor mono mode

Although the Bayer matrix cannot simply be rendered invisible for mono mode, the following two solutions show how you can achieve the desired result depending on the type of application.

1) For “grey scenes”  (i.e. dark pin on a white background)

If the 18 MP color sensor is to be used in mono mode for achromatic scenes, note that a broad band light source (white light) must still be used. This is because of the sensor’s Bayer matrix.  With this sensor, monochromatic (single color) light would have resulted in the individual pixels transmitting no or less information depending on the wavelength of the light, due to the RGB filter layers used (see Figure 2). This can result in a different brightness perception for the individual pixels. In this case, the RGB enhancement must be calibrated separately for R, G, and B. As a result, you then obtain an identical brightness perception for all pixels as with a mono sensor.

IDS Imaging
Without calibration of the RGB enhancement, the Bayer matrix is clearly visible (left).
After RGB calibration (see RGB histogram, right) there is a homo-geneous brightness perception as with a mono sensor

Note: This RGB calibration is only valid for this specific light source and a “grey” scene.  If the light source (wavelength) changes, the RGB enhancement factors have to be re-adjusted.

Contact 1stVision to obtain instructions on  switching the Bayer matrix to “invisible” using the uEye Cockpit:2) For “color or grey scenes”

If you work with color scenes in your application, the brightness sensitivity of the individual Bayer pixels constantly changes with the variation in color components. There is also a way to achieve genuine mono mode in this situation. The solution lies in the color spectrum of the 18 MP ON Semiconductor AR1820HS.

Above a wavelength of around 900 nm the color filters for the individual pixels have similar spectral properties. Beyond this threshold, all pixels on the sensor respond practically identically to incident light again – exactly as with a dedicated mono sensor. This means that the Bayer matrix can also be made invisible using this method, both for color and also for grey scenes

AR1820HS Spectrum
The colour spectrum of the AR1820HS shows similar spectral proper-ties of the colour filters above 900 nm

In order to be able to use this spectral property of the sensor as described, you must observe the following:

  • Ensure defined lighting conditions, i.e. seal off light with other wavelengths shorter than 900 nm as far as possible.
  • Order your uEye camera with AR1820HS sensor specifically with GL filter (glass). The HQ filter normally ordered with this sensor would block out the long-wave light.  By contrast, the GL filter allows light beyond 900 nm to pass with high transmission. The highest possible signal strength thus arrives at the sensor.

Full Information on the IDS Imaging UI-3590LE and UI-3590CP cameras can be found below

IDS-UI-3590LE – 18MP camera, LE version

IDS-UI-3590CP – 18MP camera, CP version

1stVision has over 100 years of industrial imaging experience!  Contact us to help select the best camera and lenses for your applications.

contact us

Best in class OEM machine vision lenses, low cost, high performance with an easy to use lens selector

OEM lenses 
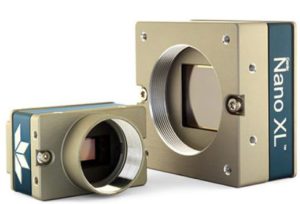
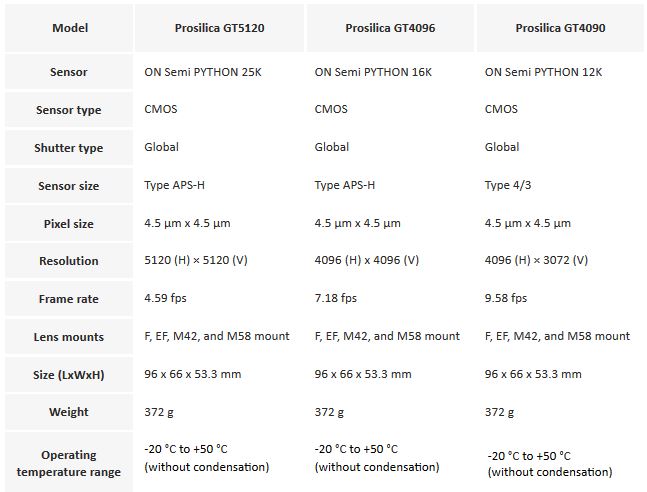
1st Vision‘s factory automation OEM machine vision lenses are designed using glass from one of the top Japanese lens manufacturers. These lenses are not branded and allow our clients to have excellent performance at a better price than the ‘named’ brand manufacturers, getting the most bang for your buck!

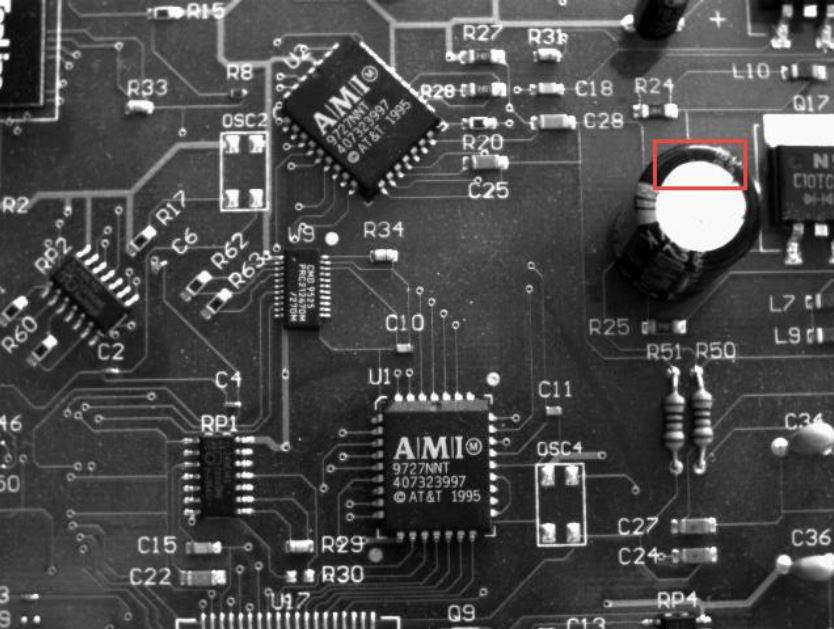
In comparing specifications, our OEM lenses have better resolution in many cases over brand name lenses, but at ~ 30% less cost in some cases.

1st Vision lens comparison
Conventional lens (left) vs 1stVision OEM lens (right)

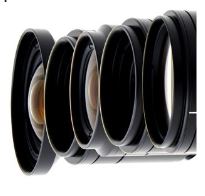
In resolution chart comparisons, the 1st Vision OEM lens on the right outperforms the leading lens in its class.   All lenses have locking screws for focus and iris.  High temperature options are available providing ranges from – 30 C to +70 C.

Details specifications and pricing can be found HERE 

1st vision lens selector
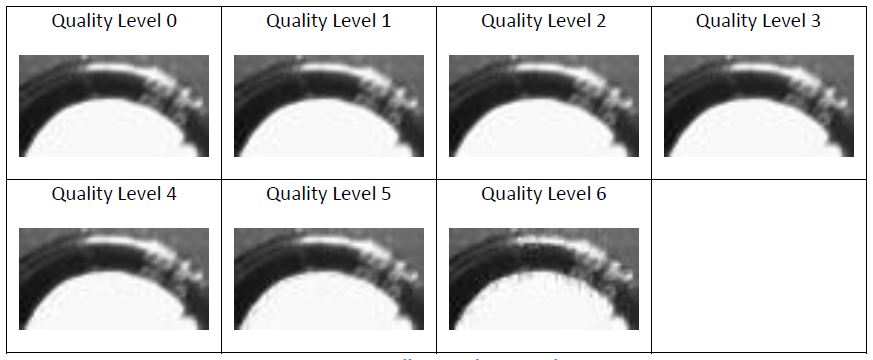
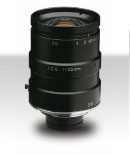
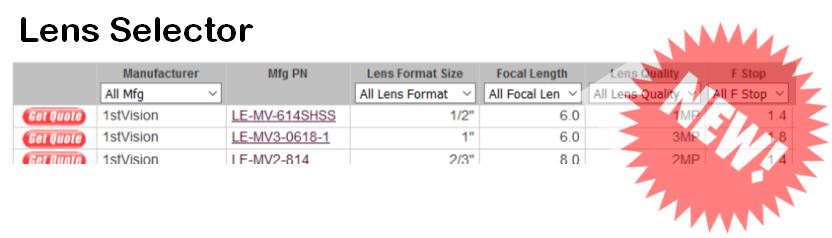
Its now easier than every to find a desired lens it the new 1st Vision lens selector.  Sort by focal length, optical format and lens quality to name a few sort attributes.  Try it now HERE!

Need help in your lens selection?  Our sales engineers all have over 20 years of vision experience and can help you identify the best lens for your application.

Contact us to talk to an expert!

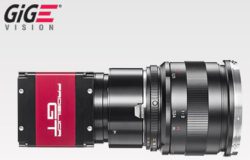
If you like our lens selector, check out the new camera selector!    Watch our short video highlighting helpful new features and selectors on our website

We also have several blog posts providing additional education on lens selection including handy focal length calculators.  Click on the resources below.

Resources:
 Calculating Lens Focal Length 
Video:  Using the 1st Vision Lens calculator
Demystifying lens performance – MTF
Calculating your resolution for machine vision applications

Beware of EMVA 1288 data!

EMVA 1288 dont be scaredMany camera manufacturers are now putting up EMVA 1288 data. This is test suite created by the European Machine Vision Association (EMVA) that give you the characteristics and performance of cameras, e.g. S/N ratio, noise, etc. , and there are specifications on how to run the tests.

Please note that there is a significant amount of variance allowed within the tests.  Each manufacturer has their own test setup, so comparing sensors or product lines from a specific manufacturer is very appropriate.

Comparing results between different manufacturers, especially looking at small details is NOT appropriate.  For instance, if Manufacturer A’s test has a 5% variance on what Manufacturer B’s test is on the same sensor, but the difference between the two manufacturers is 5%, there is no valid conclusion! The result is within the variance.  Do NOT get sucked into this comparison war.

The EMVA test produces a 30 page report for each specific camera test, testing is across multiple wavelengths, etc.  Results that are given in tabular format with one number for each camera are not really a good picture of the test results to compare across manufacturers.

If you want further details, please contact 1stVision.  We have conducted many comparison tests and can provide practical advice and discuss it in context of your application.

Contact us to talk to an expert!

Related Posts

What are the attributes to consider when selecting a camera and its performance

Teledyne Dalsa TurboDrive 2.0 breaks past GigE limits now with 6 levels of compression

Teledyne Dalsa Turbodrive

Teledyne Dalsa introduces TurboDrive 2.0 for their Genie Nanos

Dalsa Innovator awardWith the introduction of the Genie Nano came Turbodrive which allowed ‘faster GigE than GigE’ speeds. Turbodrive is a lossless hardware encoding scheme that potentially reduces the amount of data to be transmitted from the camera to the computer.  Dalsa’s Nanos, which are priced identical to the competition, offers the users the ability to go faster at no extra cost.  Note that the user can turn on or off the encoding.

However, the encoding scheme is data content dependent, and therefore if your data varies a lot within an image the compression is minimal.  If your data varies a lot from image to image, then using the encoding means that only certain frames will get a speedup resulting in an inconsistent data transfer rate.

Teledyne Dalsa Nano camera

Teledyne Dalsa has just recently introduced TurboDrive 2.0, a firmware upgrade for all Nanos. The major enhancement is that now TurboDrive offers multiple levels of encoding.  Level 0 is lossless, and each successive level has some potential lossy amount.

The table below indicates quality level,  image compression ratio (absolute worst case scenario)  and effective bandwidth gain

As you can see, at level 6, you have a worst case compression of 0.33, yet a speed up of 3.  Note, this is a worst case situation so you might get a speed up of 3x, yet be at 0.8.  The algorithm is data dependent!  (more about this in the tech primer)

Depending on the application, various compression levels provide minimal degradation.  The following images are shown for comparisons using the varying quality levels.

As you can see, even at level 4, there is very little degradation in the image.  It is easy to imagine that with this image, you can still do your image processing yet get a speed up of 68%!

Dalsa Nano Raw Image
Raw Image

Level 0 “Lossless” to Level 6 indicate the quality level in the images.

Dalsa Nano Turbodrive quality level comparisons
Quality level comparisons

Learn more by clicking the icon below for the comprehensive application note!

Teledyne Dalsa Turbodrive application note
To learn more about Teledyne Dalsa TurboDrive 2.0, please download the application note for full details.

1stVision has a ton of resources to learn about TurboDrive technology in general.  Please visit our dedicated Teledyne Dalsa Turbo Drive resource page HERE  

Contact 1st Vision

Related Blog posts:

How do you get the most pixels for your money? Check out the new Dalsa Nano C4900 camera!

Teledyne Dalsa Nano XL-M4090 cameras – 16MP cameras are now faster, cheaper and smaller!

Teledyne Dalsa Nano XL-M5100 cameras providing 25MP resolution for < $6K!