Teledyne Dalsa has released the first line scan polarization camera for machine vision. The Piranha4 polarization camera provides the capability of detecting , stress, surface roughness, birefringence and physical properties undetectable with conventional imaging making the invisible visible!
This unique technique uses four polarization channels with a color line scan camera solving various applications, but not limited to the following:
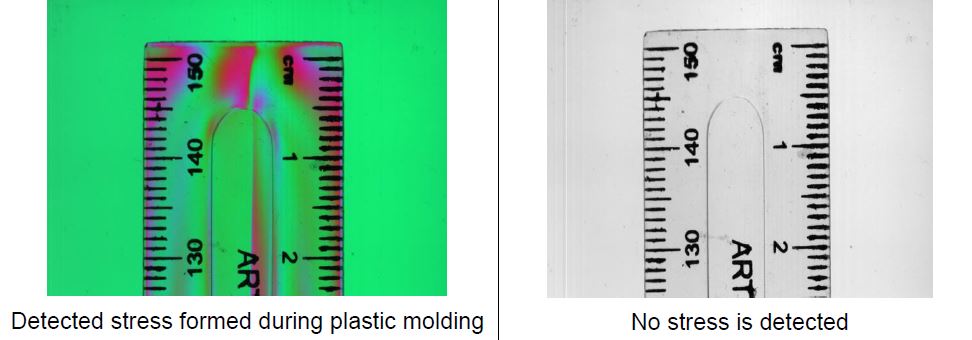
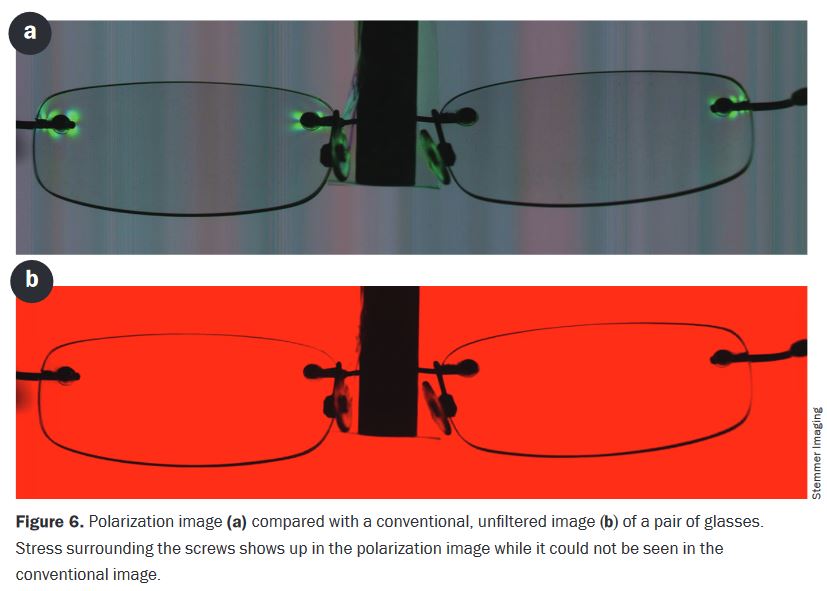
Glass Inspection: Glass bottles, architectural glass sheets, and automobile windshields, etc. – Enables inspection of internal stress and defects non-visible with conventional imaging
Film inspection: transparent films, packaging films, and patterned films etc. – Detect scratches, digs, and other surface defects that are difficult to detect with conventional imaging 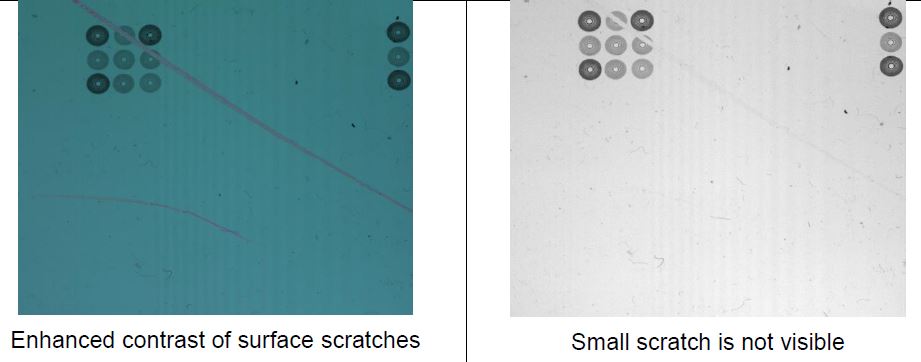
Precision optics: optical lens, prisms, fibers, and micro-optical – Detect residual internal stress and thermal annealing effects
Flat Panel Display and PCB inspection: Thin film transistors, organic LEDs, printed circuit boards etc.- inspect ITO, dust particles, films thickness, and surface defects with enhanced contrast
Carbon fibers: effectively inspect the quality of composite materials that are widely used in aircraft, aerospace, wind energy, and automotive industry
Food and material sorting: Increase sorting accuracy and detecting capability of foreign materials such as plastics, glasses, metals etc. with polarization imaging
Bio-medicine: digital pathology, in vitro cells culture, optical coherence tomography etc.- Provides additional information in birefringence tissues
Remote sensing: helps identifying special objects from natural background
And many more…

Line scan polarization camera Features
- CMOS Quadlinear sensor – 2048 pixels
- High speed line rate of 70k hz with 14.08 um pixels
- Camera Link interface
- Three polarization states plus and unfiltered channel (Output format with 0 deg (S component), 90 deg (P component), 135 deg and unfiltered polarization states.)
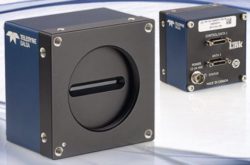
Full specifications on the Teledyne Dalsa polarization camera ( P4-CP-02K07Q-00-R ) can be found HERE

White Paper – Learn about this unique polarization technique with line scan cameras! This white paper covers the following topics
- How polarization techniques work in transmission and reflectance configuration
- Comparison of three polarization filter technologies
- How the sensor architecture is configured for polarization effects and visualization of defects.

1stVision has a strong working knowledge of polarization techniques, line scan cameras and lighting and can discuss your application in detail.

Related Blog posts:
Teledyne Dalsa release of low cost GigE and camera link color line scan cameras
Video Tutorial: How to setup HDR Imaging in Teledyne Dalsa Linea Line scan cameras