IDS peak 2.17.1 / uEye+ firmware 3.70
IDS Peak comfortSDK, genericSDK, IPL, and AFL developer manuals are external documents. Please contact us if you need them.
|
Hint for Linux Note that you need root privileges to configure the IP address of a camera. |
To configure the IP address of a GigE camera, proceed as follows:
1.Open the camera manager by clicking ![]() in the main menu.
in the main menu.
2.Select the camera in the camera manager.
3.Click ![]() to open the dialog for configuring the IP address.
to open the dialog for configuring the IP address.

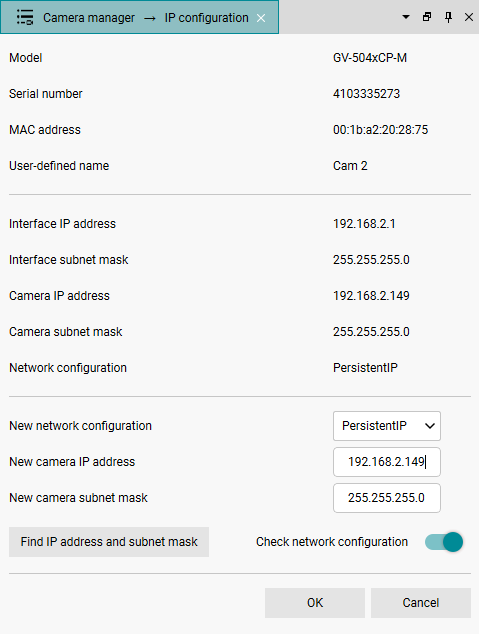
Fig. 233: Configure the IP address of a GigE camera
In the upper part of the dialog, you see information about the selected model, such as the model name or the serial number. In the middle, the current settings for the interface and the camera are displayed.
In the lower area, you can change the camera configuration:
•New network configuration
For the configuration of the IP address, you can choose between DHCP, PersistentIP or LinkLocal, see also IP configuration and DHCP.
•New camera IP address
Here, you enter the new IP address of the camera.
•New camera subnet mask
Here, you enter the new subnet mask of the camera.
•New camera gateway
Here, you enter the gateway address of the camera.
•Find IP address and subnet mask
Click this button to determine a suitable IP address and subnet mask for the camera.
•Check network configuration
Disable this option if you want to configure the IP address of the camera for another network.
•OK
Click this button to apply the new settings to the camera. The camera must be restarted for this. Afterwards, the window will be closed and the camera manager will be displayed again.
•Cancel
Click on "Cancel" to cancel the current configuration and return to the camera manager.
